28 November 2014

Whats new at Resinail

Today I've got some new polishes from Resinail to show you. Michelle very kindly sent me 3 colours to try but a gorgeous pale pink decided to explode in transit. Luckily there was lots to like with the 2 polishes that made it. 


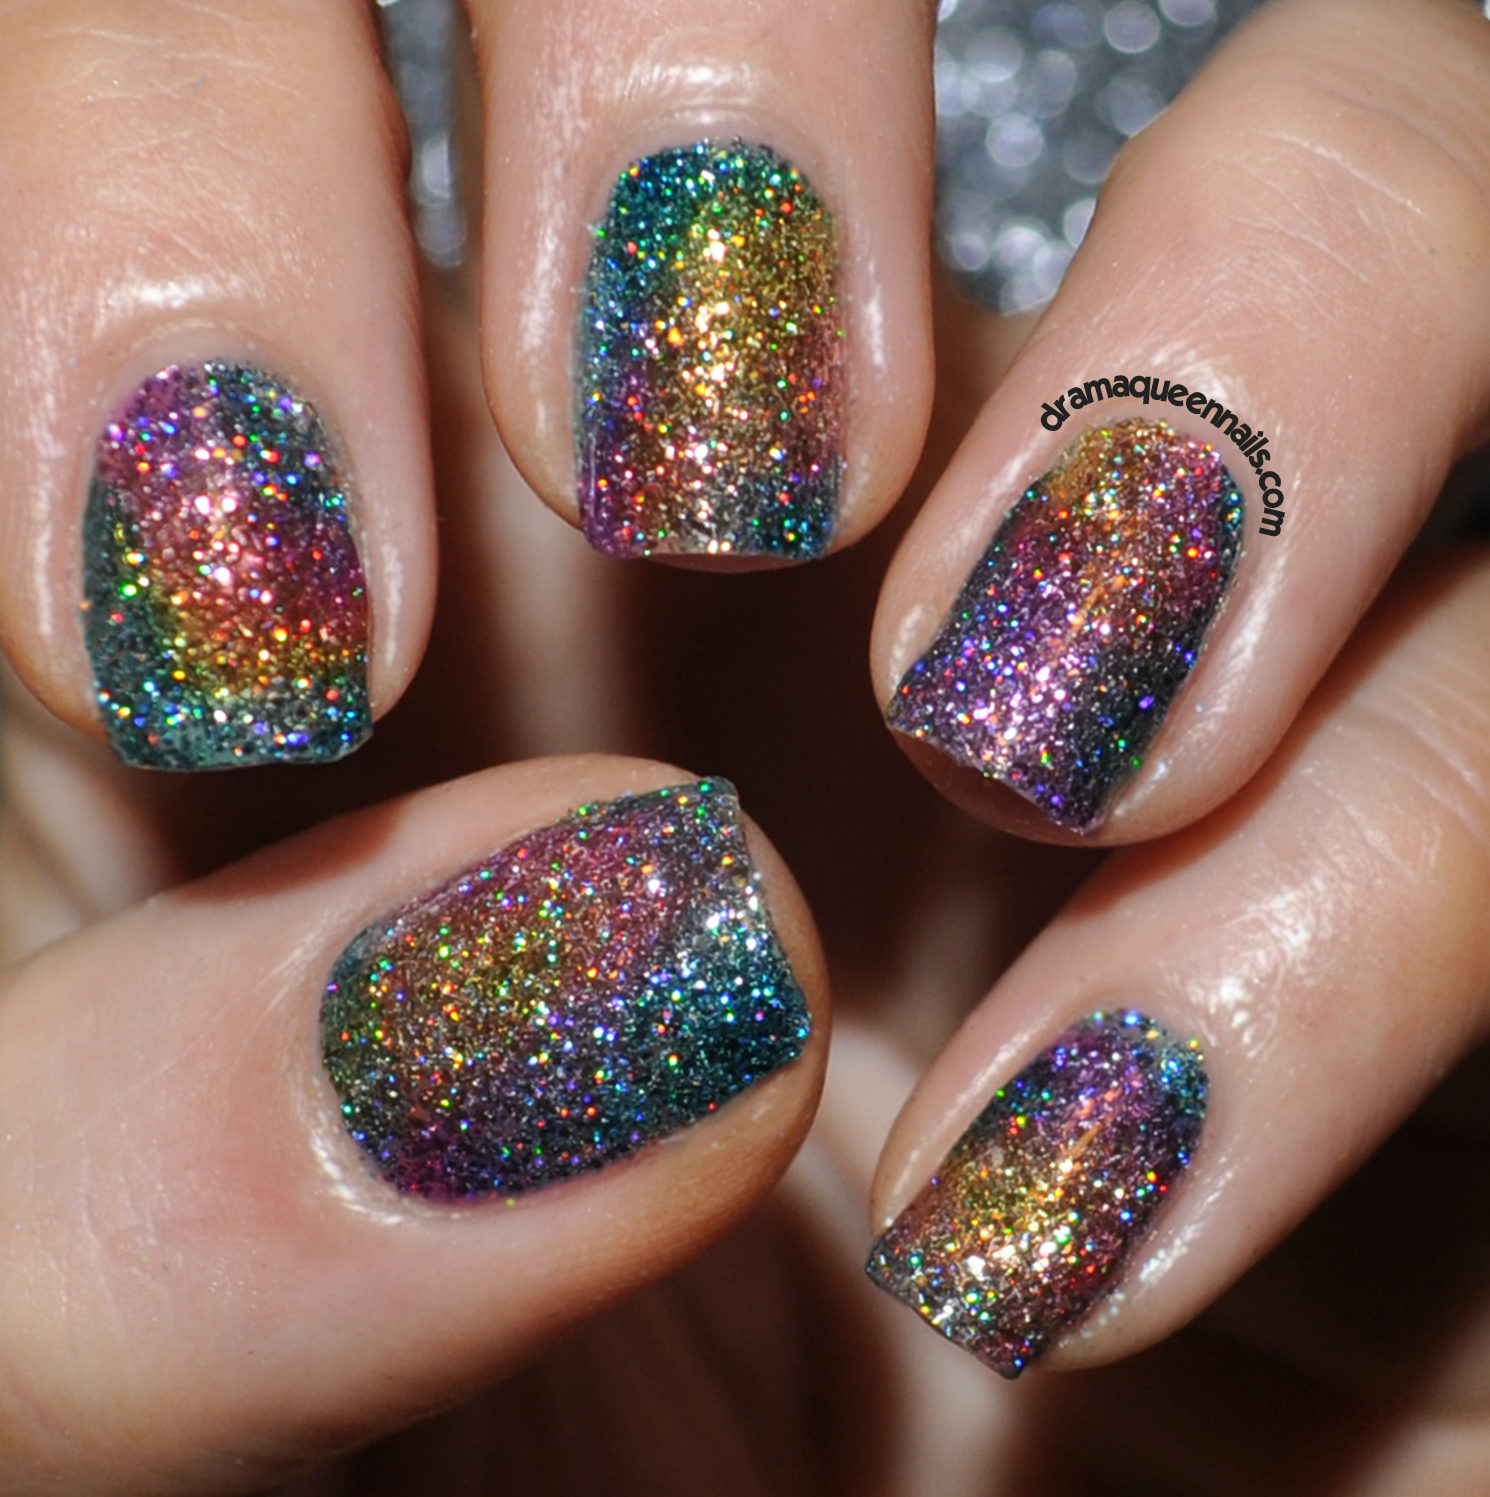
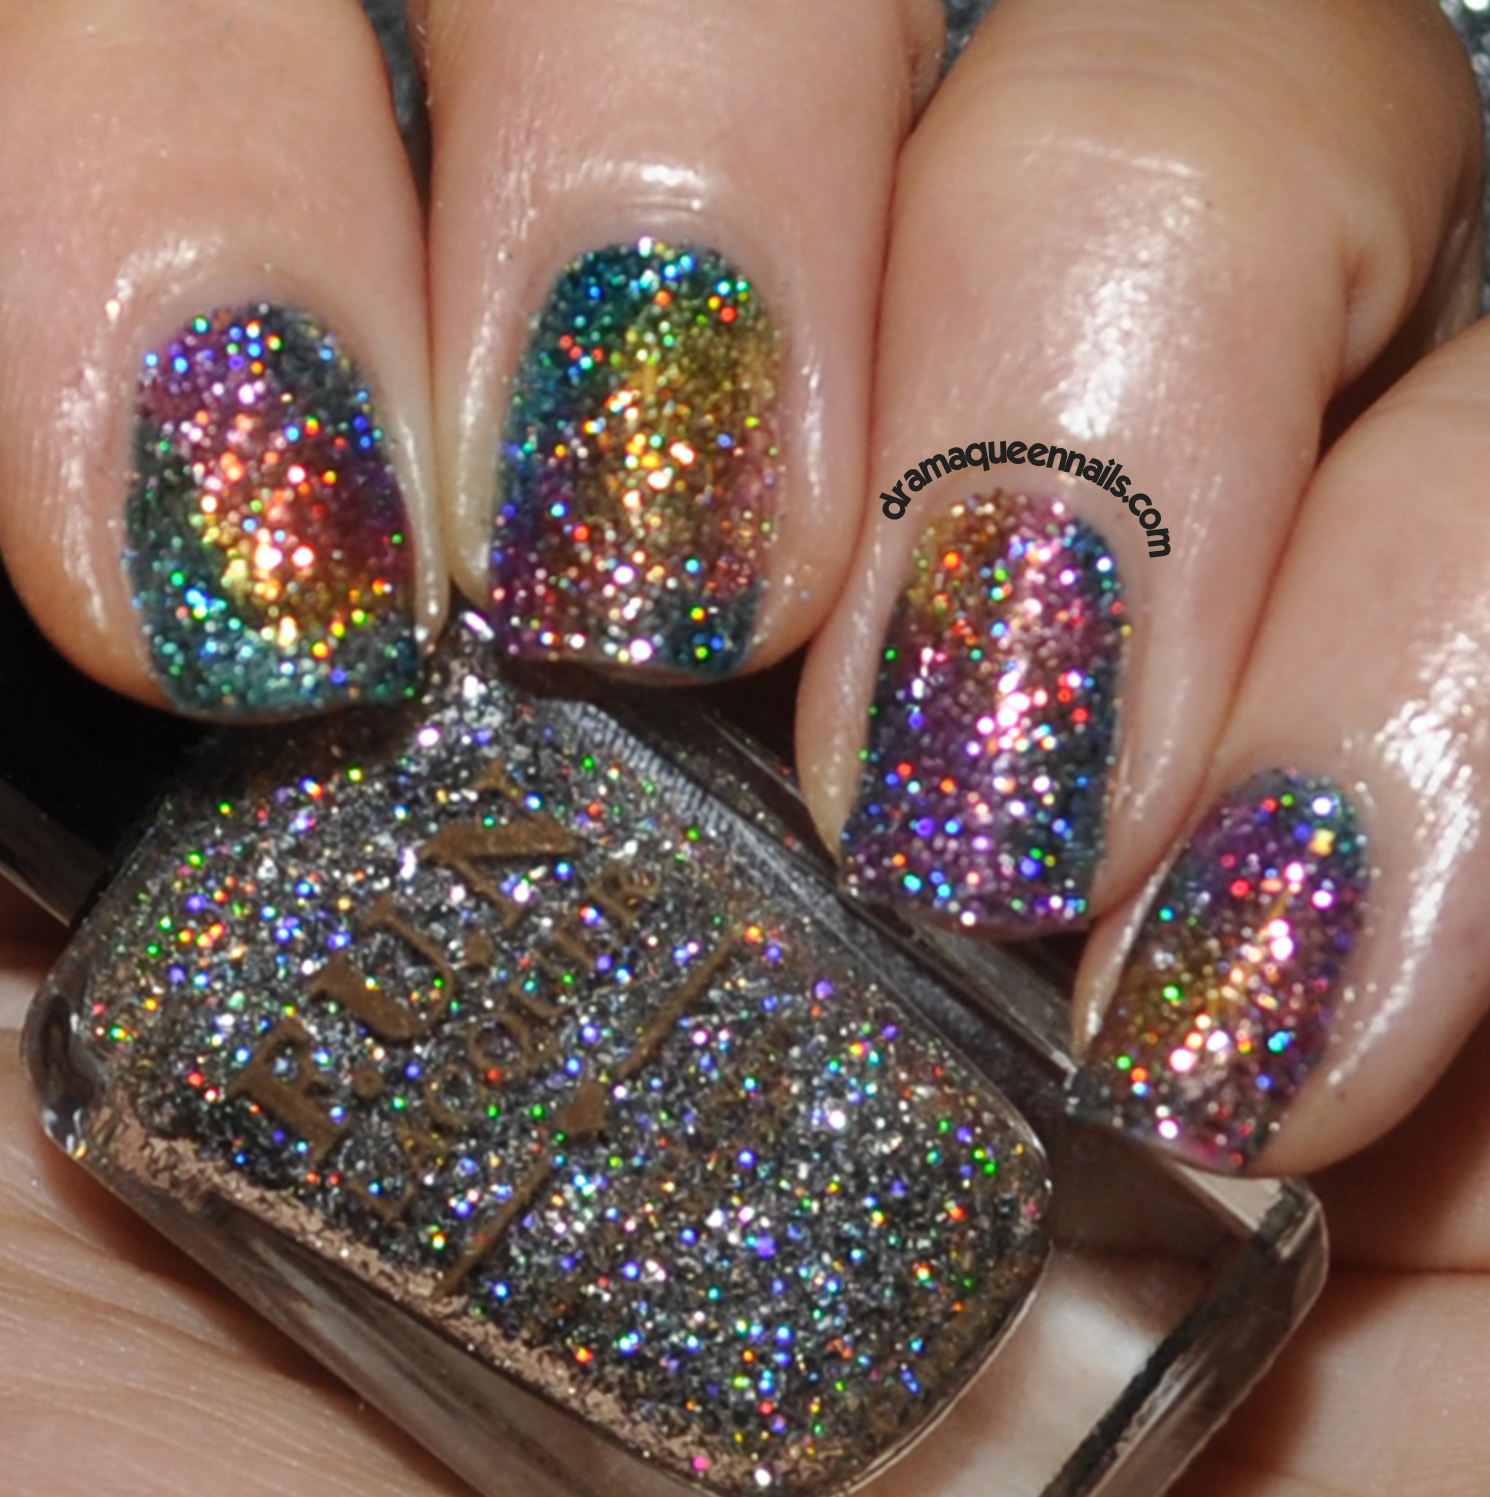
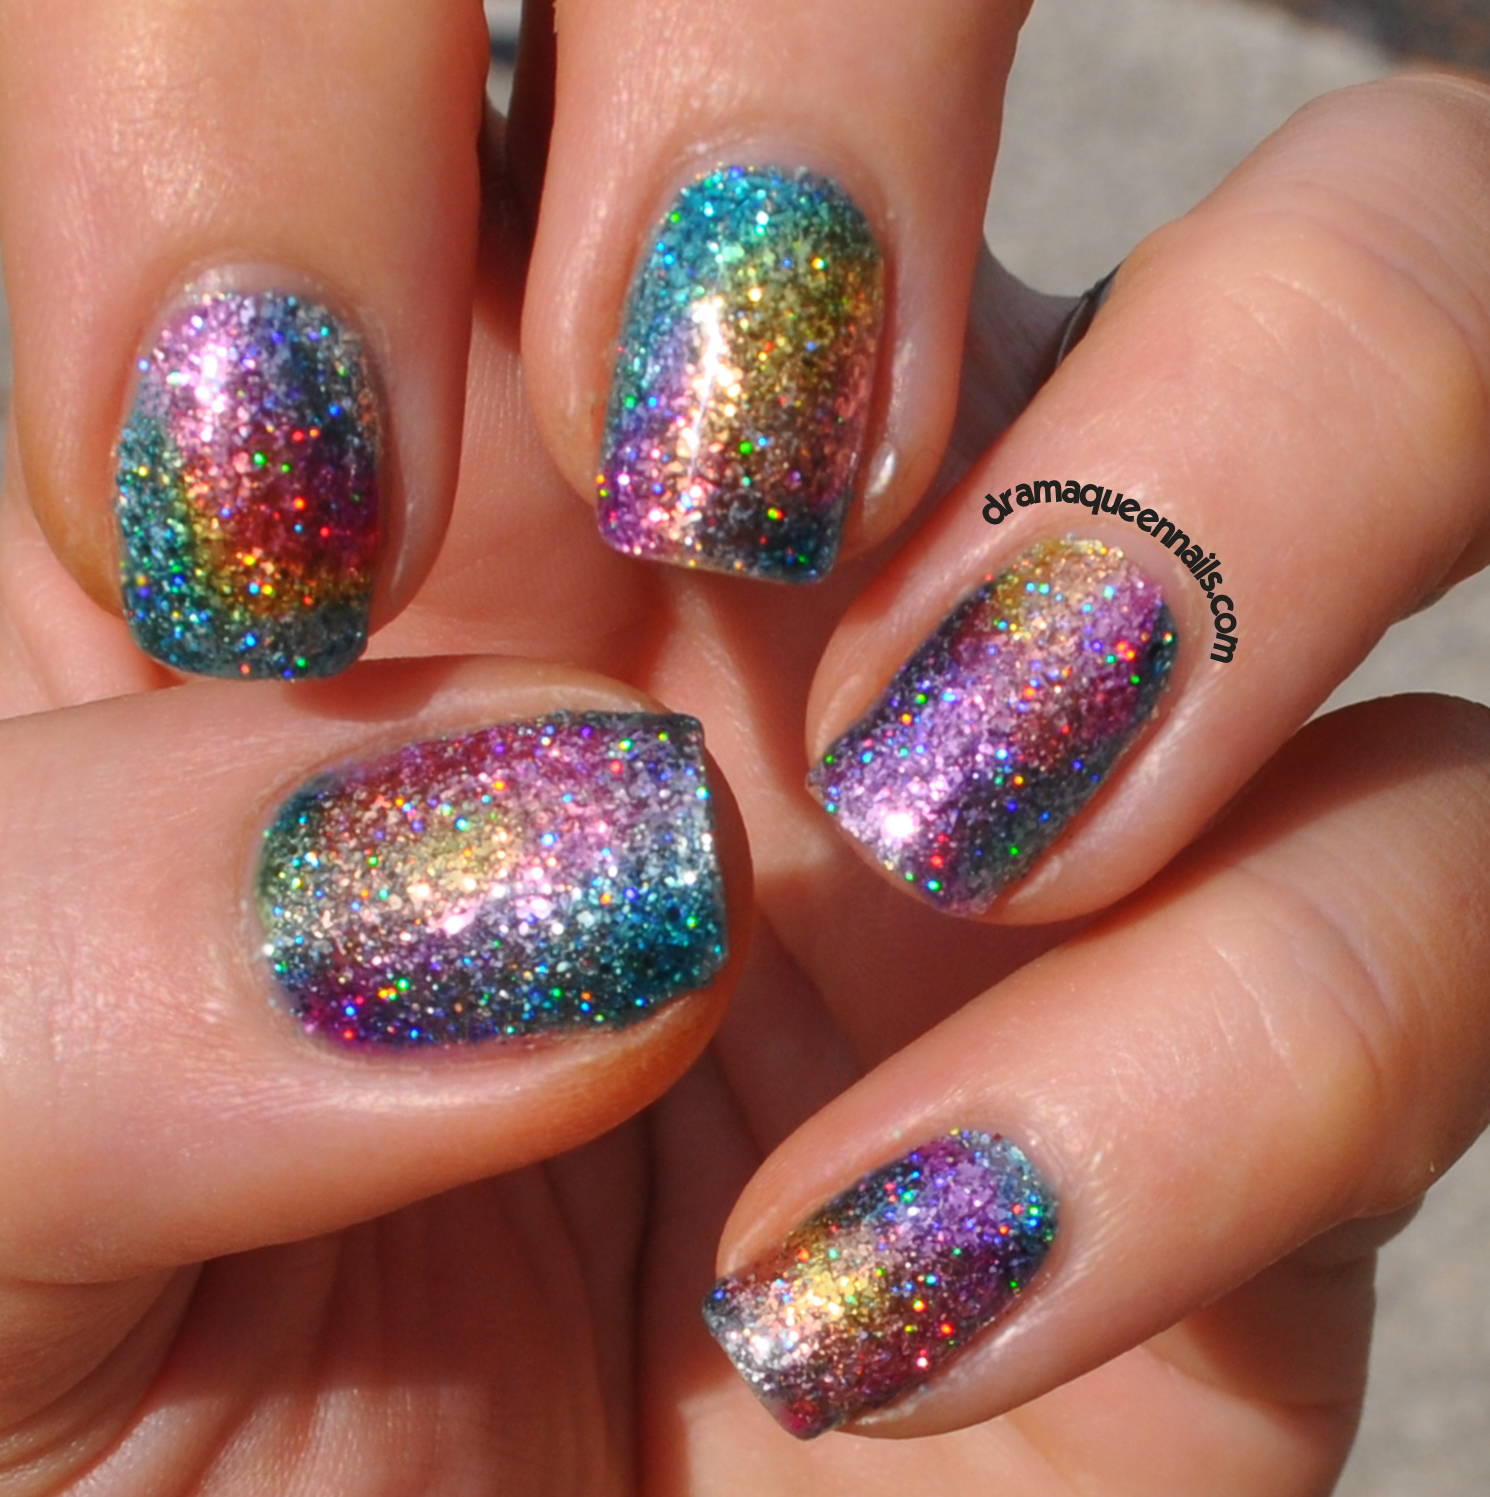
This is Resinail - Grape Shimmer. A glittery mulberry/grape and gold polish that's seductive and chic. It was really hard to capture its beauty as its colour shifts into some beautiful combos of purple, pink, red and gold. 


I got so many compliments on this colour. For this design I used Resinail Grape Shimmer as the base, Mundo de Unas stamping polish (gold) and the new Pueen 24B-L Buffet Leisure stamping plates (plate 77) which are available here. Gold flakes are Zoya - Gilty and Gold Satin is OPI - Love.Angel.Music.Baby. 


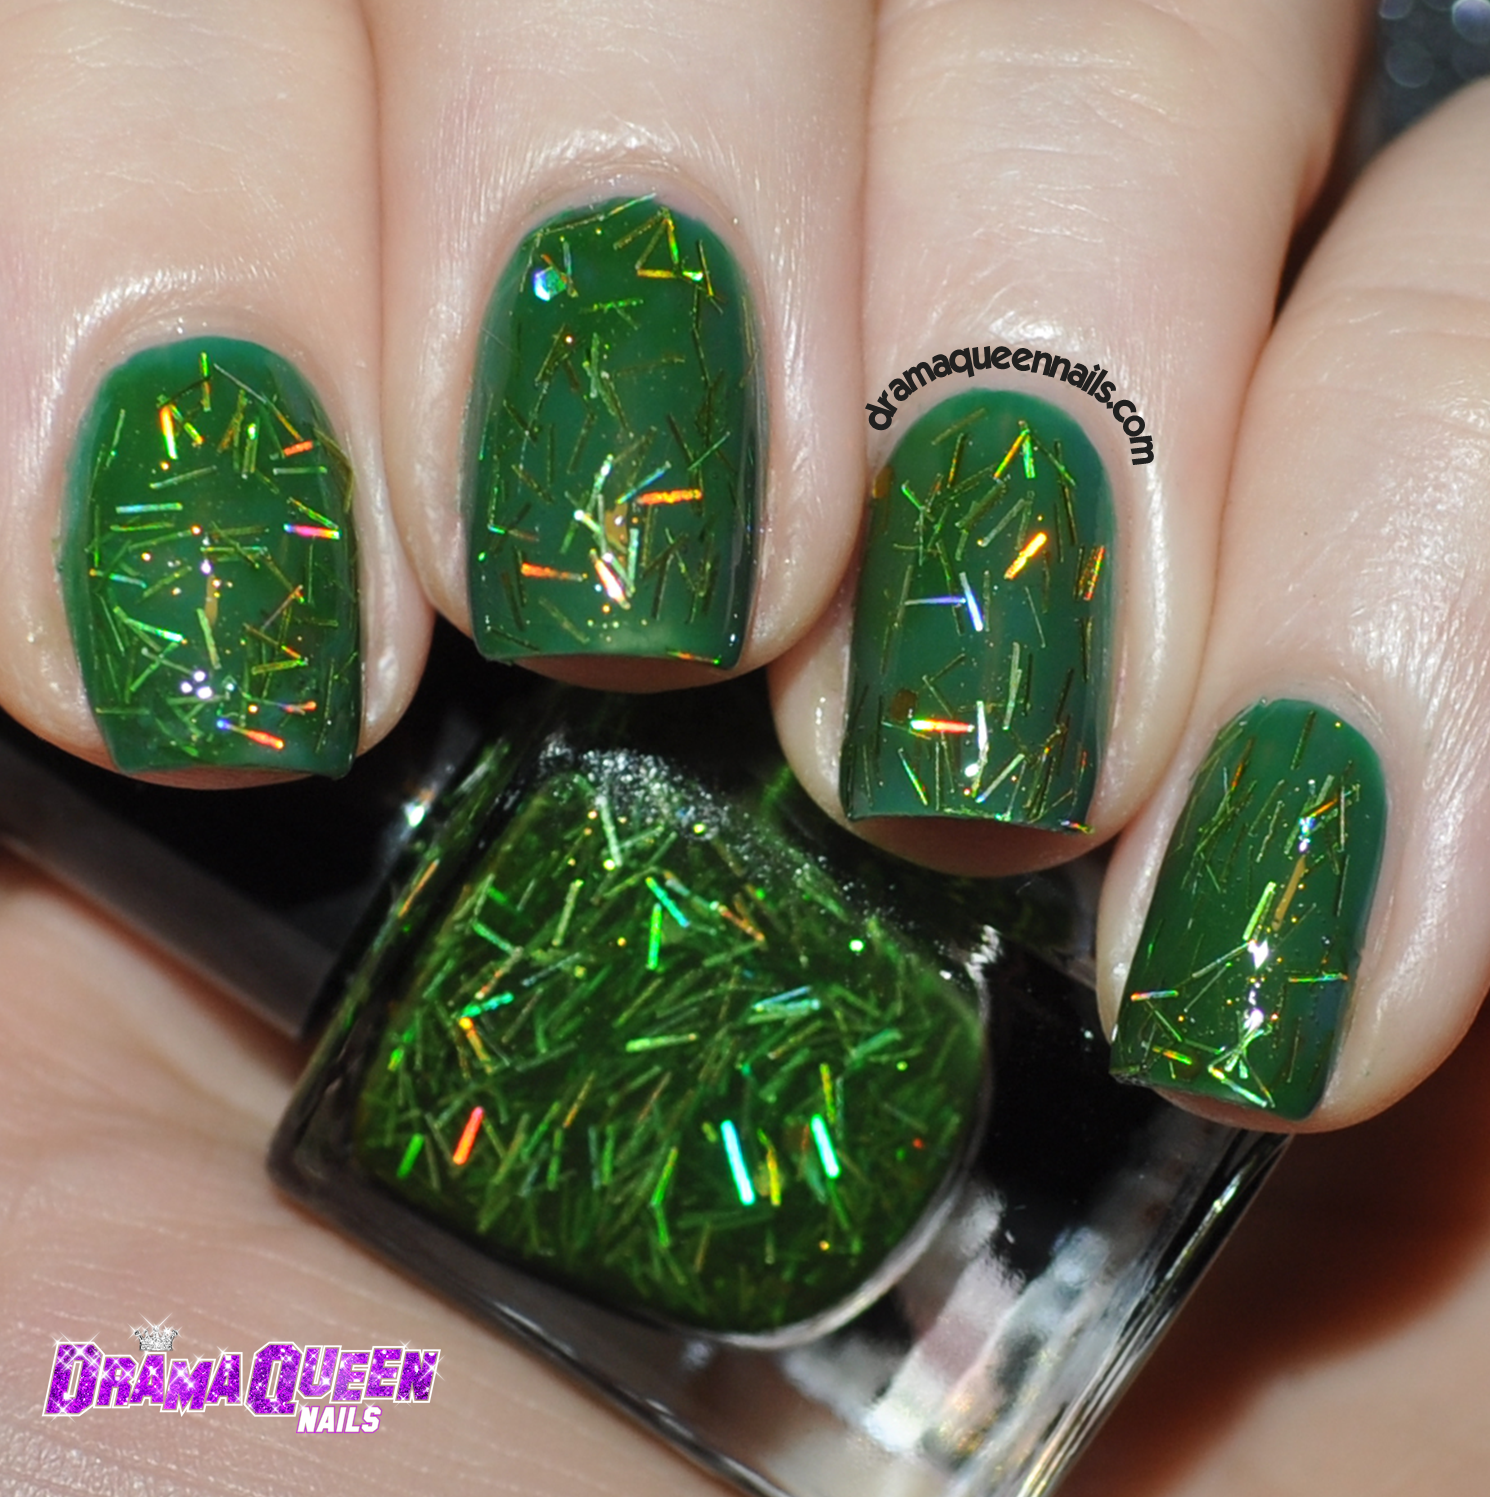
This is Resinail Xmas 2014 LE - Holo bar glitter, green jelly polish. The base is a sheer tinted green. This pic is Xmas layered over OPI - Jade is the new black. I would definitely recommend undies for this one. The polish is packed with bar glitter, only a very thin coat is needed. 


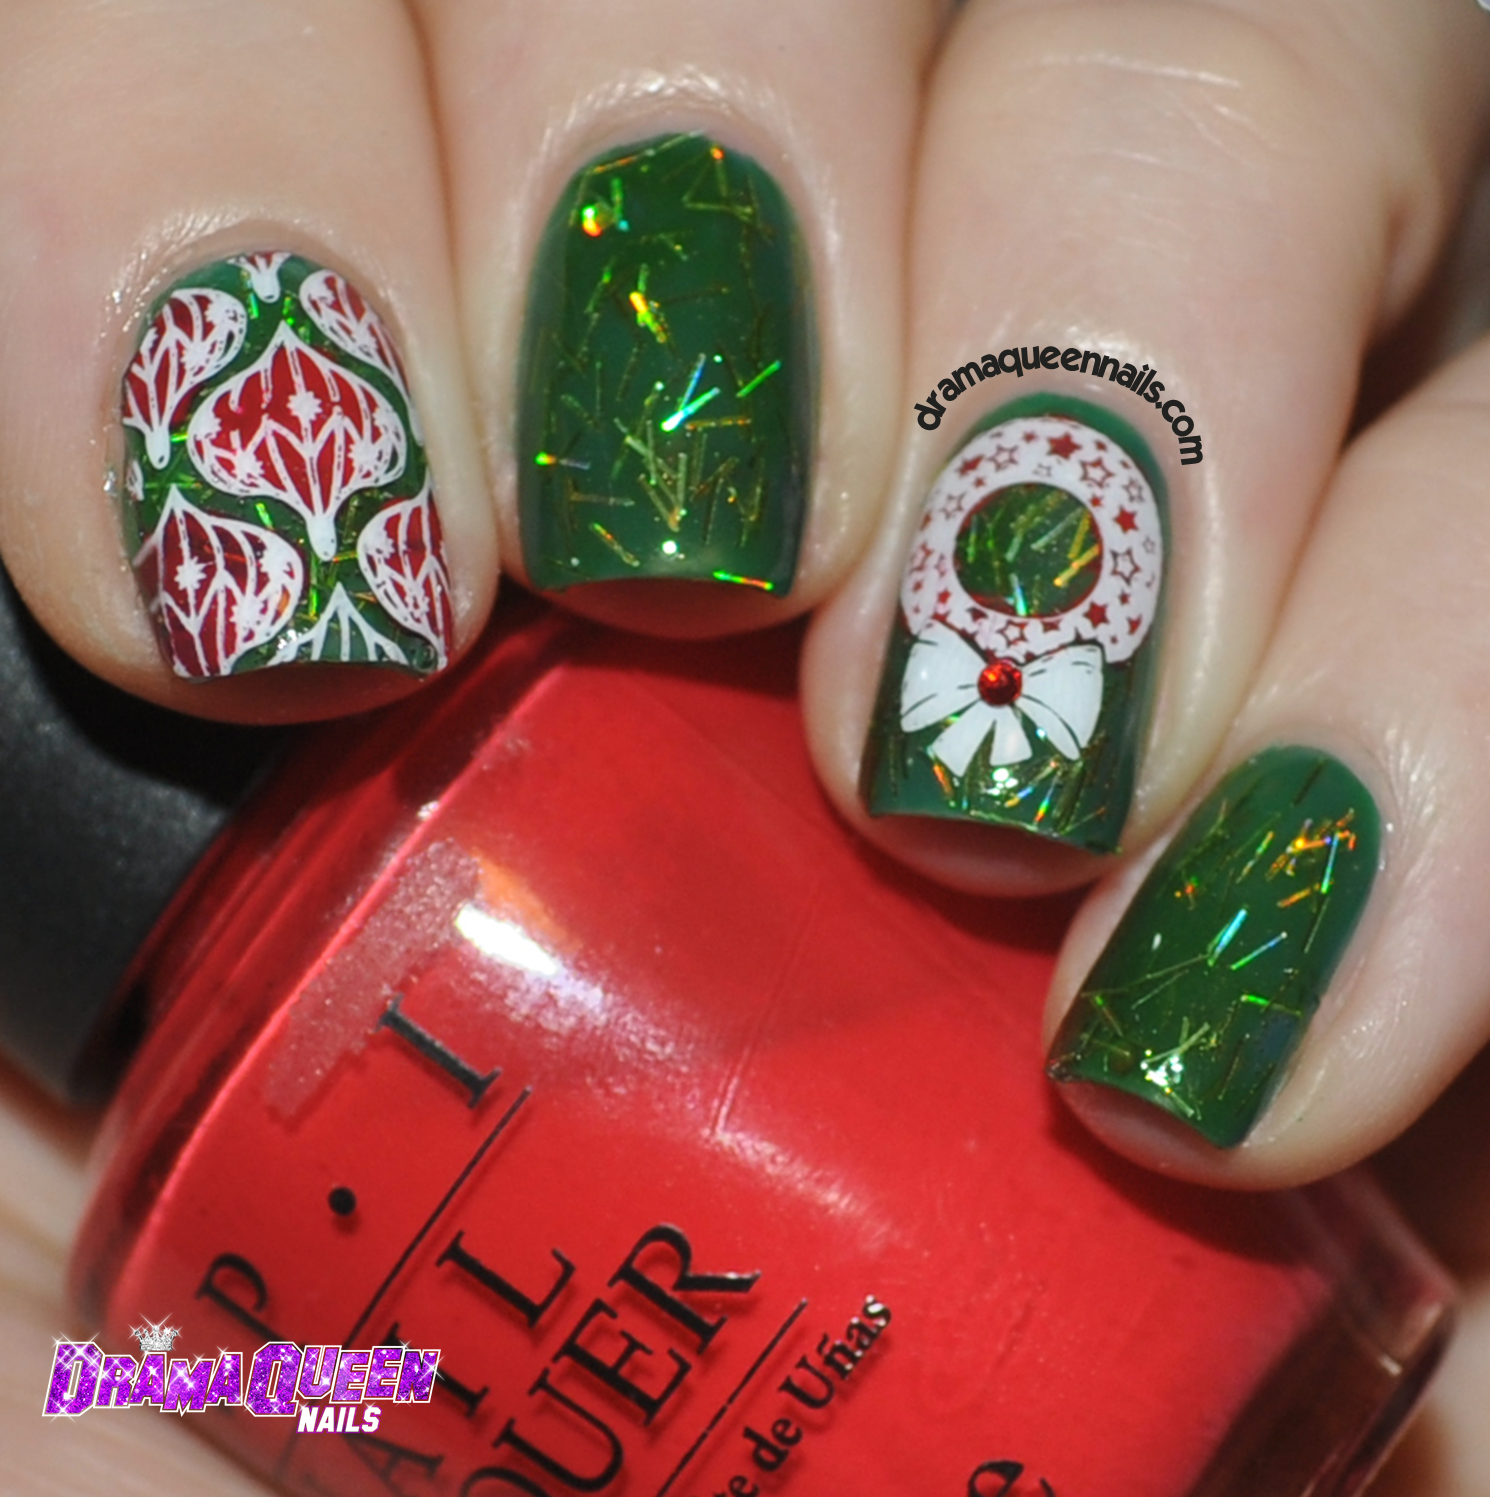
Xmas was just begging for some Christmas art so I made some decals using the Bundle Monster - Holiday collection which is available here. I really loved how these turned out, Im feeling really good about making decals these days.


Michelle has released lots of other gorgeous sparkly Resinail polishes which you can check out at her store HERE.  

Foil Effect - Fun Lacquer..

After a few years of polish collecting I have gotten to a point where it takes a lot to impress me enough to need to purchase something. OPI collections have left me underwhelmed this year, and its getting very hard to distinguish yourself as an indie polish maker unless you have something really unique and different from what's out there.  But then something really special comes along that changes everything.....foil effect polish.


Fun Lacquer - Queen - Foil Effect - Holo glitter polish

I cannot rave about this linear holo polish enough. 2 coats to full opacity, once it dried it really did have the plastic sheen of foil. My nails looked like they had nail wrap stickers on because the polish is perfectly thick and so dense with glitter, yet it dried as flat and smooth as a pancake. This polish is a true triumph! It was pretty much impossible for me to photograph accurately due to the excessive bling levels. In the bottle its a dark silver rainbow fun-house. 


Using traditional foil is not easy. Its really difficult to do full nail coverage with nice, clean edges. There are always little gaps and tiny bald spots at the cuticle line and sometimes you get crinkles. Well for those of us foiled by foil...see what I did there.....this is the polish for you. Get the look of of foil in a flash with Fun Lacquer.


21 November 2014

Love Lime Crime - Love Vegan Beauty

If you have been following our DQN blog for a while you will know how much we love our Lime Crime nail polishes. So much so that they have featured in many designs over the past 2 years. They are the most fab polishes for nail art as they are really opaque and easy to work with. Even better they are 3 free, cruelty free, vegan, and they have UNICORNS ON THE BOTTLES! 


DQN is super happy to be working together with Vegan Beauty, another sparkly Aussie business that stocks amazing Vegan beauty products. Forget googling individual brands to choose cruelty free options, all the beautiful things you need are all in the one place. I mean come on now, there are holographic unicorns on the lipsticks...sparkle sparkle! 


Vegan Beauty stocks a huge range of Lime Crime products including lipsticks, eye shadows and the newly formulated Lime Crime neon pastel nail polishes.
Vegan Beauty has a great offer for DQN shoppers. 
10% discount store wide (excl. delivery) valid for 2 weeks 21/11 - 5/12 Code: dqn


You can find Vegan Beauty here:
Shop - Facebook - Blog 
Lets take a look down memory lane at some of the manis I have done using my Lime Crime polishes.


I think I seriously need to invest in some backups, after all they have reformulated so technically, its really like a whole new collection!

Thanks so much Vegan Beuaty for offering us Aussies a conscientious range of beauty products that not only make us look pretty but help us look after the animals xx


12 November 2014

Rainbow Sparkle Nails with Fun Lacquer

A unicorn came and sprinkled magical rainbows of glitter on my nails. 


The good news is, even if you don't have a unicorn yet you can still have ALL THE SPARKLES!!! This technique is super easy. You need 3 key items: 

  1. A beyond amazing silver chunky scattered holo polish. I used Fun - Lacquer - Queen (Foil Effect Holo).  I experimented with plain silver glitter polishes but the chunky silver holo definitely boosted the rainbow effect.
  2. Some tinted nail polish colours.
  3. A plastic sandwich bag. 

Dribble mix tinted polishes into little swirly blobs of colour on the sandwich bag. Leave them to dry for between 30min-1 hr. 


I did get little bubbles in my decals when they were dry but when you stick them on they are not noticeable at all, the sparkle hides the little imperfections. Pull them off a still tacky, don't let them dry out too much. 


Cut up the decals as closely to size as possible before applying to nail. If they are just tacky enough they will stick themselves but its good to run a swish of base coat over your holo around the edges of your entire nail to create a 'glue' outline to help stick down the edges of the decal. Photo below is before the decal is cut to size. 


Tinted Polish are speciality polishes but easy to find or make. They are see through polishes that kind of look like cellophane paper. I used all 4 polishes from the OPI - Tint Collection. If you want to see some other amazing nails using this technique go check out @ermahgerdperlish. Her's are stunning, STUNNING!! 


 You can make tinted polish by adding drops of opaque colours to clear polish but its kinda messy so just go buy some OK. They are great for those super chic see through lace designs that are popping up at the moment and for nail art in general. You can use them for reverse stamping and stamping decals too. 

Hope you guys like these nails as much as I do and try it out for yourself. I promise that you WILL walk into something because you cant walk in the sun without staring like a maniac at your own nails xx 


8 October 2014

How to make decals on your stamper video

So the challenge wrapped up last week and I've taken a few days off from nails to recharge myself and spend some time with my family. It was bliss! But it wasn't too long before my pretties called me back.


Before the challenge I wrote a post about how to make decals on your stamper with some pics. But during the challenge I used the decal method so much and refined it each time so I decided to make a video for you guys to show you how I do it now.


The two biggest changes I've made are taking the decals off after 30-45 min, don't leave them too long so that they stay sticky. Secondly not using any base coat to stick them on. They stick on by themselves like a sticker and you don't get pesky bubbles and rips. Yay!

I hope my video helps you out and that you give it a try. It's pretty easy. Best advice, when you are pulling the decal off the stamper don't pull in the same direction all the time, the decals will stretch and distort. Alternate the sides you pull from so you don't distort the image and if it still starts to rip leave it another 10 minutes. If you leave it over night these decals go brittle and cant be used, they don't stick or curve to the nail. 


Polish:

  • Zoya - Dot
  • BC - Shade 8
  • OPI - Alpine Snow
  • Mundo de Unas - 29
I should mention that I live in Brisbane, Australia which is sub tropical (30 degrees) most days at the moment, so I'm pretty sure that has effect on dry time. If you live in colder climates and find the decals are ripping when you pull them off adjust dry time. I would be really interested to hear from you guys if this is an issue. If you live somewhere cold and you try this out please let me know how you go xx 

1 October 2014

#31dc2014 Day 31: Honour nails you love

And...I'm done, I'm done, I'm done! Whoop I made it!. Albeit a few late days here and there. The last day of the challenge is a great one, honour nails you love. Well the possibilities are endless really, there are so many amazing ladies out there creating beautiful wearable art. It was hard to choose just one to recreate but I settled on this beautiful subtle mani by @nailsbydanielle on IG.


Polish:

  • BC - Shade 8
  • OPI - Mimosas for Mr and Mrs
  • Alana Renee - Golden Snitch


And with that last photo I award myself a sticker, pat myself on the back and start cleaning my house!


Thanks Sarah from Chalkboard Nails for the great stickers.

30 September 2014

#31dc2014 Day 30: Inspired by a tutorial

I can see the light! The light at the end of the challenge tunnel! Only one more mani to go and it will all be over for another year. I look forward to Day 30 and 31 as I get really inspired by the daily themes, tutorials and honouring nails you love. For today's nails I really wanted to try and work on my dry marbling skills. I love swirling polish randomly, I think it looks floaty and gel like. So to challenge myself I decided to try to make an actual dry marble pattern. 


I turned to Youtube for guidance and came across a tutorial by Sveta Sanders Nails. Wow, she is amazingly talented. The video made it look so easy!  It took me a while to find 2 polishes that worked well together. I'm no expert at this technique but I found creally (jelly/cream) polish that has decent opacity seemed to get the best results. I used Picture Polish - Candy and Picture Polish - Mad Magenta. 


I took my first attempt off and totally redid them because the first lot were horrendous. These ones made the cut...just. Go check out Sveta's if you want to see this design done amazingly well. 

29 September 2014

#31dc2014 Day 29: Inspired by the supernatural

Well this is what happens when I sit down to do nails without a plan. NEON! These kind of came out of nowhere. I really liked the skull decals I made the other day and that same stamping plate (Sugar Bubbles SB029) was still sitting on my desk. Skulls say supernatural to me and Drama Queen Skull with her little crown was just begging to get stamped and of course she wanted to be neon pink. 


Polish:

On the back of the stamper decals I used white polish to make the neons pop. The Mundos worked awesomely for making the decals, they came out so vibrant! My eyes burn! I made the swirly stamping decals on my stamper. Head to my original stamper decal tutorial post HERE for the full details on how to do this. Below is a super condensed version with the basic idea.


My top tips for making decals and applying them are:

1. Dont let them dry too much. Leave them 30 min - 45min. The longer you leave them the more brittle they become making it harder to curve to your nail and get clean edges.
2. When you peel off and apply the decals they should be sticky enough to stick to the nail without basecoat. I don't use anything to stick mine on any more. If you peel them off the stamper when they are still pliable and a tiny bit sticky they apply like a sticker...yes really! 
3. Try not to "pull" on the decals when you are peeling it off the stamper, work from all sides and roll the stamper as you are pulling the decal off so you don't stretch the design in one direction. I have killed many decals doing this.


These nails are so me. Supernatural funk! xx

28 September 2014

#31dc2014 Day 28: Inspired by a flag

If I had to pick my least favourite day of the challenge it would have to be today. Flags! Ugh! Not very inspiring, but soldier on I must so I went for a cool colour combo this year and took artistic license. Greece...stripes....Olympics....doves!


Polish:
  • China Glaze - Wait and Sea
  • China Claze - Foe Audrey
  • Kleancolors - White strier
  • Kleancolor - Silver striper

The stamp is from the Winstonia 2nd gen collection, plate 205, stamped with Konad white. So glad this day is over and I can get to work on something a little more me tomorrow xx 

27 September 2014

#31dc2014 Day 27: Inspired by artwork

Weee bubbles! Everything is better with bubbles! When I was thinking of something for today I went on a mind tangent reminiscing about the types of artwork I learnt how to do at school. One of my fav techniques was bubble painting and I remember many crafty afternoons making invitations and letter writing paper to send to friends (in a distant pre email life). So this was the catalyst to go searching for some bubble art online and I was spoilt for choice...so many sparkly colourful bubbles. 


Polish:
  • OPI - Skull and gloss bones
  • Picture Polish - Mad Magenta
  • China Glaze - Liquid Leather
The stamp is from a Dashica Stamping Collection, plate Dash 7 stamped with Konad Powder Silver. This is the bubble picture that really jumped out at me, I love how the bubbles get smaller in a gradient.


To create these nails I started with a grey base. I sponged on magenta with a little piece of sponge, then repeated the sponging on the tips with black. Add on the bubble stamp and that's it. 

The accent finger looks so dreamy to me, I love how it came out. To create the bubble look I dotted on random blobs of magenta over the black base with a dotting tool. I then used a cotton tip soaked in acetone and placed it in the centre of the dots to spread out the polish and create the bubble "ring" look. To get the bubble shine I added different shades of purple crystals over the bubble rings and applied topcoat over the entire nail.


Man I wish I didn't have to keep taking these off each day! xx 

26 September 2014

#31dc2014 Day 26: Inspired by a pattern

The end of the challenge is in sight and Im spurring myself along with the thought that soon I'll have my life (and clean nail room) back. Its not that I'm not enjoying the challenge, I really am, but it is very time consuming and I don't get to keep any of the designs for more than a day! Anyway, today's inspiration is a pattern and there are few patterns more recognisable than paisley. 


Polish:
  • Zoya - Carter (Deliciously rich purple pixie)
  • OPI - Angel with a lead foot 
  • Stamped with some fab new Aussie indie stamping polishes that I will reveal more about at a later date.
The stamping plate is from Bundle Monster 300 series, plate 315 - available here. 


I think these turned out really cool and I'm excited to be able to show you some more of these amazing stamping polishes in the future xx

LinkWithin

Related Posts Plugin for WordPress, Blogger...